Installing solid brass rivets can be done using a few different methods, depending on the size and quantity of rivets you need to install, as well as the tools you have available. Here's a breakdown of the common methods:
Method 1: Hammer and Bucking Bar (for most solid rivets)
This is a traditional and effective method, especially for smaller to medium-sized rivets and when you don't need to install a large number quickly.
Tools You'll Need:
- Solid Brass Rivets: Ensure you have the correct diameter and length for your project. The rivet length should be the total thickness of the materials being joined plus approximately 1.5 times the rivet diameter to allow for forming the tail.
- Hammer: A ball-peen hammer is often preferred, as the rounded end is used for shaping the rivet tail. A regular hammer can also work.
- Bucking Bar (or Anvil): A heavy, smooth metal block with a slightly concave depression or flat surface. This is placed against the factory head of the rivet to provide a solid backing. You can also use a sturdy anvil.
- Drill and Drill Bit: To create a hole that matches the diameter of your rivet. The hole should allow the rivet to pass through snugly without being forced.
- Optional: Rivet Set: A specialized tool with a cupped end that fits over the manufactured rivet head. It helps to protect the head and ensure a consistent, rounded finish.
- Optional: Hole Punch: For softer materials like leather, a hole punch of the correct size can create a clean hole.
- Optional: Cutters: For trimming excess rivet tail if necessary.
Steps for Installation:
- Drill the Hole(s): Align the materials you want to join and drill a hole through all layers where you want to place the rivet. The hole diameter should match the rivet shank diameter.
- Insert the Rivet: Place the solid brass rivet through the pre-drilled hole, with the factory head on one side of the materials.
- Position the Bucking Bar: Place the bucking bar firmly against the factory head of the rivet on the opposite side where you will be working. Ensure the bucking bar is well-supported.
-
Shape the Tail (Peening):
- Using the hammer, gently strike the tail (the plain end) of the rivet. Start with light, even taps around the center of the tail.
- Gradually work your way outwards, mushrooming the tail over the material. Rotate the workpiece as you hammer to ensure even forming.
- If using a ball-peen hammer, the rounded end helps to create a rounded, finished look.
- The goal is to deform the rivet tail so that it creates a secure and tight clamp on the materials being joined. The formed tail should be wider and flatter than the original shank.
-
Finishing (Optional):
- If you're using a rivet set, place the cupped end over the factory head and strike the other end with the hammer. This helps to create a uniform and finished look on the head.
- If the formed tail is uneven or has sharp edges, you can continue to gently hammer it to smooth it out.
Method 2: Rivet Gun (Pneumatic or Hand-Powered)
For larger projects or when you need to install rivets more quickly and consistently, a rivet gun is a good option. These tools provide controlled force to deform the rivet tail.
Tools You'll Need:
- Solid Brass Rivets: Again, ensure the correct size and length.
- Rivet Gun: Choose a rivet gun designed for solid rivets. Pneumatic rivet guns are faster and more powerful for larger rivets or high-volume work. Hand-powered solid rivet squeezers are also available.
- Bucking Bar (for pneumatic guns): Often still required to support the factory head. Some hand-powered squeezers have integrated anvils.
- Drill and Drill Bit: For creating the rivet holes.
- Appropriate Rivet Sets/Dies: Rivet guns use specific sets or dies that match the head style and size of your rivets.
Steps for Installation (General - may vary depending on the specific rivet gun):
- Drill the Hole(s): As in Method 1.
- Insert the Rivet: Place the rivet through the hole.
- Position the Bucking Bar (if using): Support the factory head.
- Set the Rivet Gun: Install the correct rivet set/die for your rivet size and head style. Adjust the pressure (for pneumatic guns) or the tool as needed.
- Apply Force: Position the rivet gun over the rivet tail and activate it. The gun will apply controlled pressure to deform the tail against the bucking bar or integrated anvil, forming a secure joint.
- Inspect: Ensure the rivet is set correctly and the joint is tight.
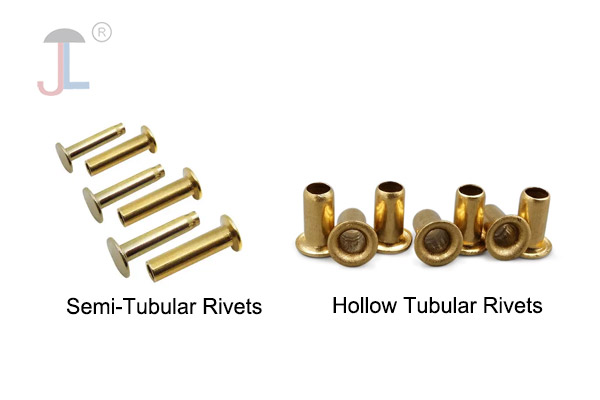
Method 3: Rivet Setting Tools (for smaller, specific types of solid rivets)
For some smaller solid brass rivets, especially those used in leatherworking or crafts (like double-cap rivets or rivets with burrs), specialized hand setting tools are available.
Tools You'll Need:
- Specific Solid Brass Rivets and Corresponding Setting Tools: These tools are often designed for a particular style and size of rivet. They usually consist of an anvil and a setting punch.
- Hammer or Mallet: To strike the setting punch.
- Hole Punch (if needed): To create the initial hole.
Steps for Installation (General - may vary depending on the specific tool and rivet type):
- Create the Hole: Use a hole punch if necessary.
- Insert the Rivet: Place the rivet through the hole.
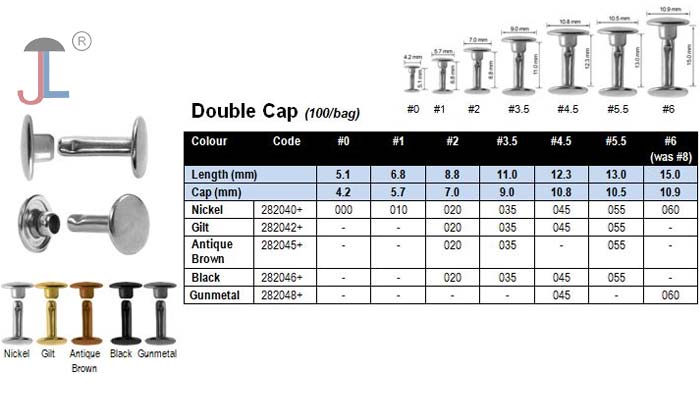
- Add any Washers or Caps: Some rivets use a washer (burr) or a decorative cap on the tail side.
- Position on the Anvil: Place the rivet head on the anvil part of the setting tool.
- Set the Rivet: Place the setting punch over the rivet tail (or cap) and strike it firmly with a hammer or mallet. This will deform the tail and secure the rivet.
Important Considerations for Installing Solid Brass Rivets:
- Rivet Size and Material Thickness: Choose the correct rivet length to ensure enough material for forming the tail without excessive waste that could bend. The rivet diameter should be appropriate for the load and the thickness of the materials.
- Hole Size: The hole should be a close fit to the rivet shank. Too large, and the rivet won't form correctly or create a strong joint. Too small, and you'll damage the materials trying to force the rivet.
- Support: Always provide solid support behind the factory head of the rivet during setting.
- Controlled Force: Apply even and controlled force when hammering or using a rivet gun to avoid bending the rivet or damaging the materials.
- Safety: Wear safety glasses to protect your eyes from flying debris.
By following these methods and considering the important factors, you can successfully install solid brass rivets for a strong and aesthetically pleasing fastening solution. Remember to practice on scrap material first to get a feel for the process.
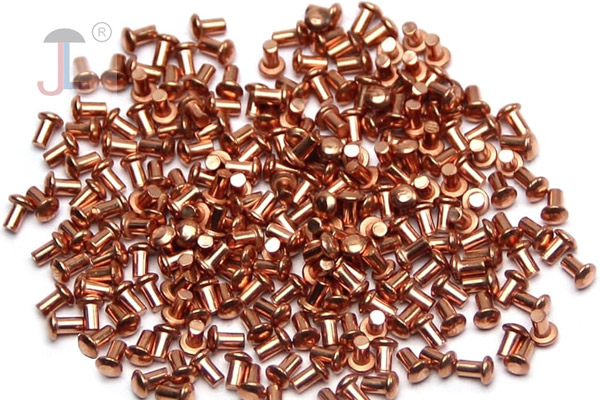
Need a fastening solution that combines strength with aesthetics? Check out our solid brass rivets, offering the perfect balance for projects where both function and appearance matter.